Unexpectedly, insanely amazing good luck happened to me, and at very short notice I’m finding myself in New York City!
I flew in from London yesterday, and will be here for ten glorious days, most of which I’ll spend in the Garment District, of course. I have never, ever been more excited! I’ve read every single blog post ever written about the area, and I’m planning to compile these in a post once I’m back home. But the Mother of all is of course Mimi’s Shop The Garment District, complete with a map – hallelujah!
When I was preparing for this trip, I thought about how I hate carrying shopping bags, I want my hands free. I also knew that I wasn’t going to hold back, and that I’d most likely will be buying tons of fabric. As googling “donkey-hire Manhattan” didn’t yield any suitable results, I looked around for suitable shopping bag options. No luck, I didn’t find any that even remotely would do what I wanted. So I decided to make one, of course. As I had very little time to make it, the bag’s finishes, the photos and this post are very slapdash, but I still wanted to put it out there (writing this in a jet-lag-wrestling moment). I’ve probably missed a few steps, but here’s a rough how-to-on-the-fly.

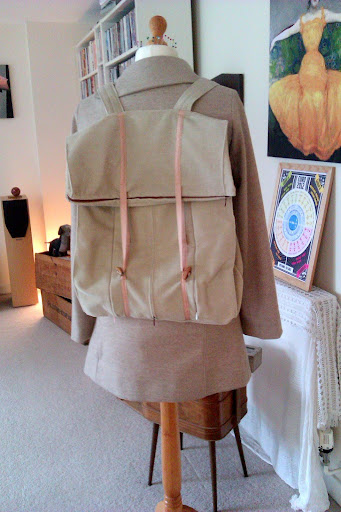
Finished rucksack looks smallish and normal, and matches my coat
Objectives: I wanted the bag to be as small as possible so I could fold and fit it into my normal handbag. It needed to be a rucksack with tons of room, but no pockets or anything. It would be nice if it was smallish to start with, but expandable somehow. And I wanted the bag to blend in with my coat, making it as invisible as possible, as rucksacks are so dang ugly and touristy.
The bag is essentially a pretty basic tote or a square tube. The top part folds down when the bag is not full, and held down by duffel coat buttons on ribbons pushed through loops at the front.
When bag is getting super-full, but you still have more shopping to do, open three vertical zips at the front to expand the bag more. YEAH!
Width when empty: 38cm, Height: 63cm, Depth: 15cm (seam allowances not included here, these are the finished bag measurements). Seam allowance throughout is 1.5cm.

I had long zips in my stash (approx 47cm), which determined the height of the “front yoke”.
In the drawing, green is main fabric, blue is the inserts/panels hidden behind closed zips. The sides wrap round to the front, up to the first zip, then there are two main fabric panels beside the middle zip.
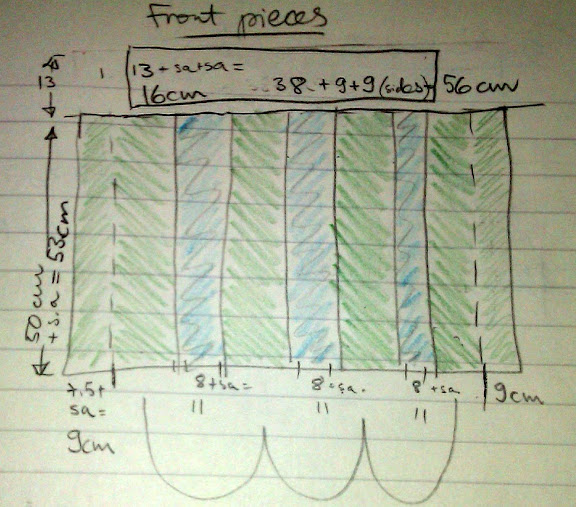
Here are the measurements of the fabric panels needed to make the front with zips (seam allowance included).
Main fabric: Top yoke Height: 16cm, Width: 56cm (seam allowance included).
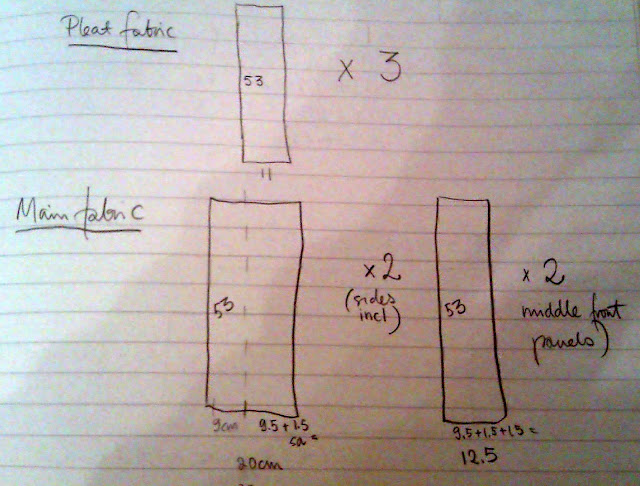
Also main fabric: Four panels, two are wider, as they’re going round the corner also becoming the sides. So cut two 53x20cm, two 53×12.5cm.
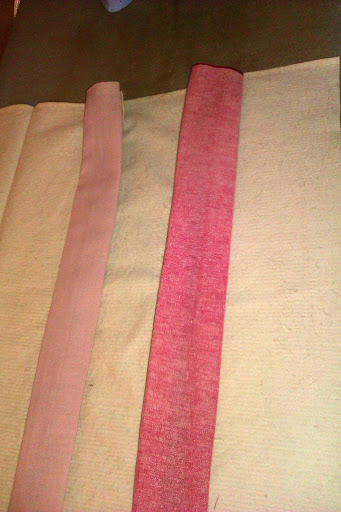
Pleat fabric is the fabric that you’ll see when you open the zips – your chance to choose something eye-catching! : Cut three 53x11cm.
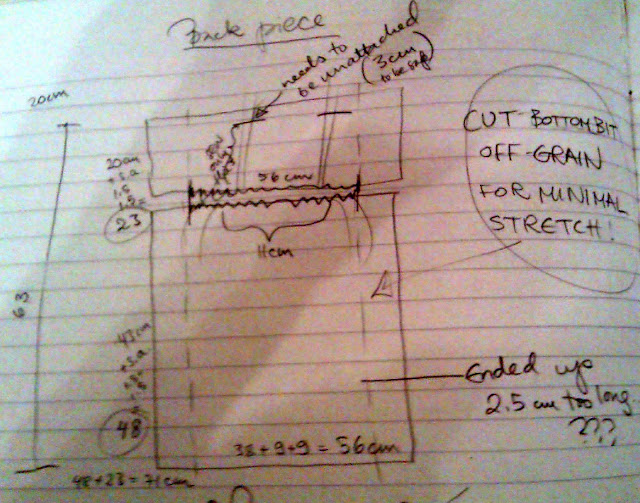
The back is also split in bottom piece and top yoke.Top yoke Height: 23cm, width 56cm.
Bottom piece: Height 46cm, width 56cm (see where I’m confused why the bottom piece ended up over 2cm too long? That happens when you think 43+1.5+1.5=48!)
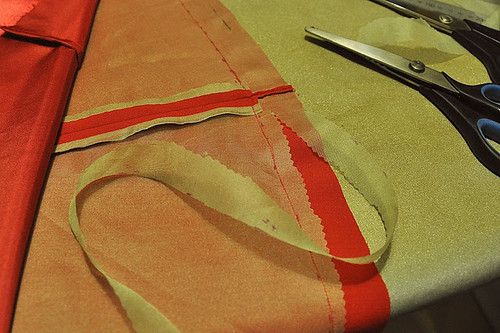
Let’s look at the expandable zip bit. Invisible zip closed…:

…and zip opened, adding lots of room to the bag:

Insert the zip as you normally would onto the main fabric (you’ll repeat these steps for all zips) MAKING SURE THAT YOU HAVE THE ZIP PULL AT THE BOTTOM WHEN CLOSED, so opposite to what you’ll be used to. This way you can open the zips only a bit when the bag is not quite full, and expand bag only at the bottom:
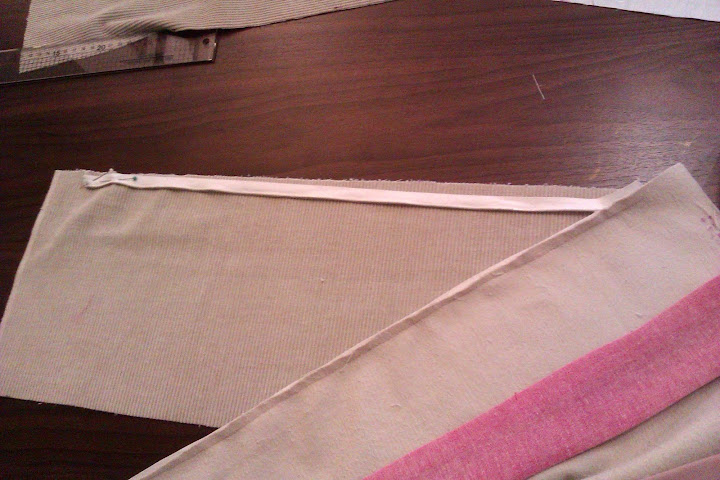
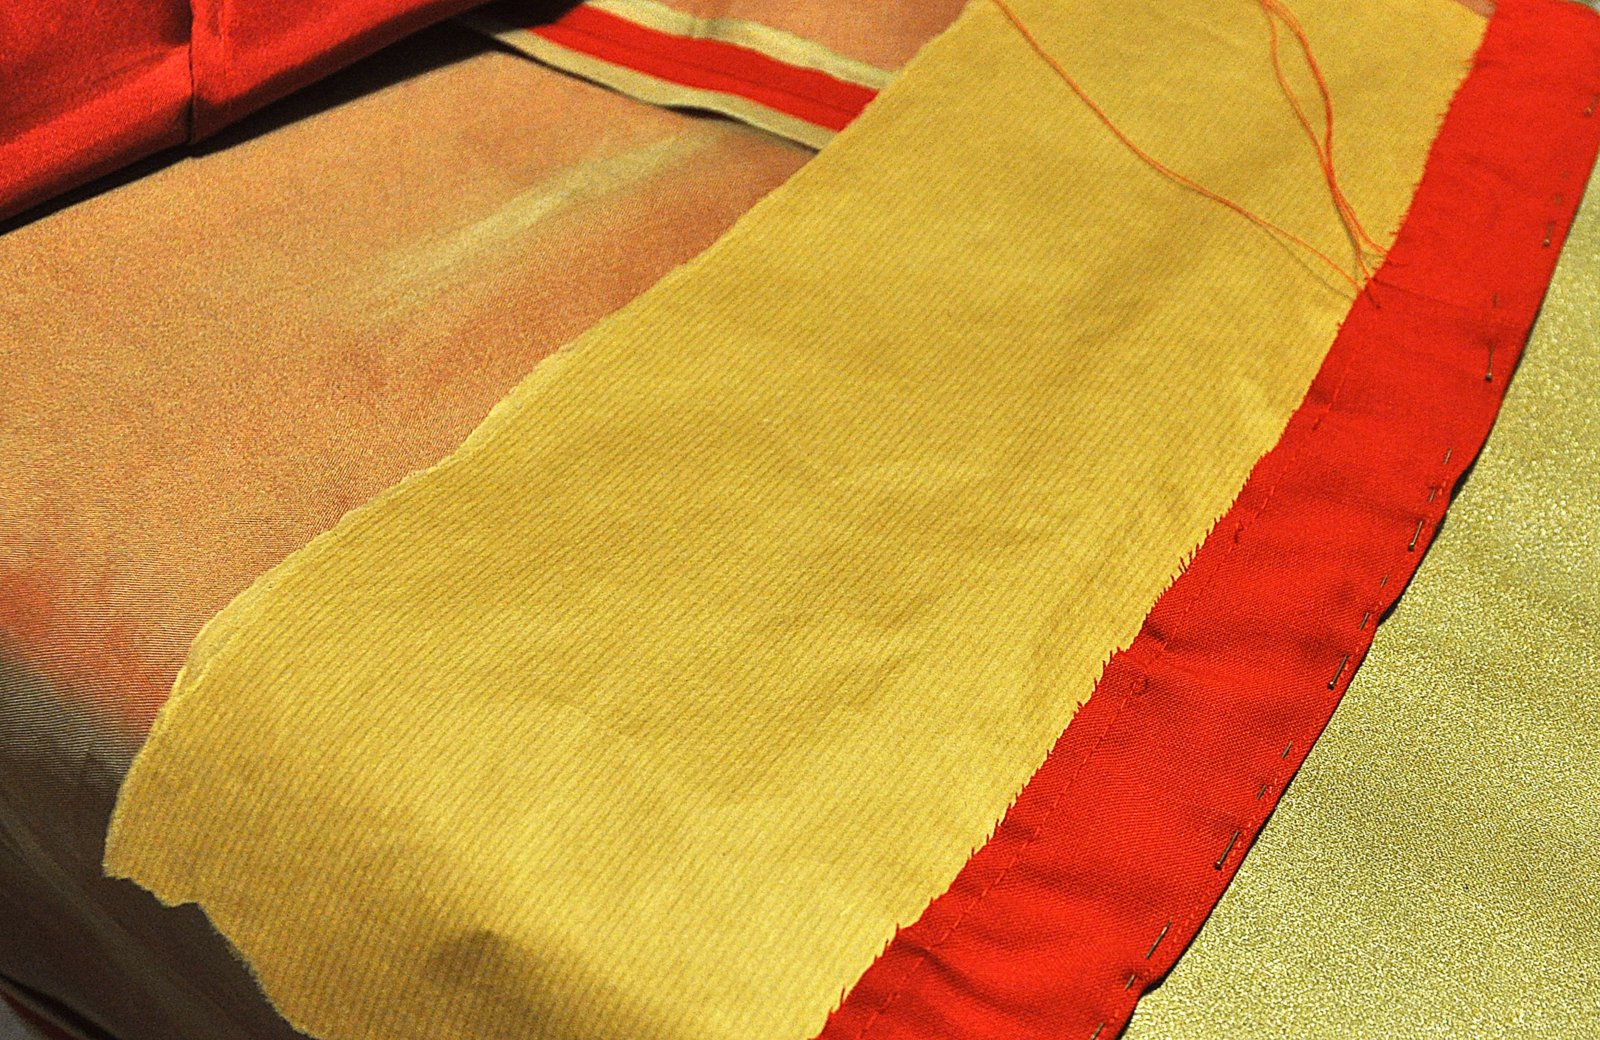
Once both zip sides are attached, sew on your first panel square edge as seen here (sandwich order: main fabric, zip, pleat fabric), using your zipper foot, going along the zip coil, like you did before (you can sew this seam further to the fabric edge, actually):
 Then sew the 2nd edge of the panel onto the zip, as before, looks like this:

Keep on truckin’ until you’ve inserted all three zips and pleats (one of zip insertions below is another method that didn’t look good, but no time to unpick…). Pay attention to the order of the panels, the wider main fabric panels go to the far left and far right, the thinner panels in the centre. Seams above and below zips are stitched closed.
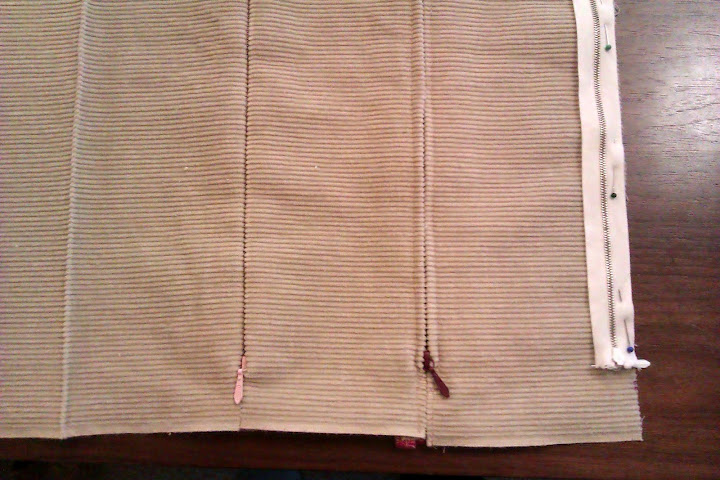
On the inside (two of the three pleats). Press them down nicely, but don’t melt any plastic zips you might be using…
To make the bag a little neater and structured, I stitched a kind of faux piping corners. On all four main fabric pieces (front and back yokes, and front and back main pieces, fold and press the sides 9cm in. Edge-stitch this (using a blind-hem foot will keep it even). I moved the needle position to the left to make it easier.

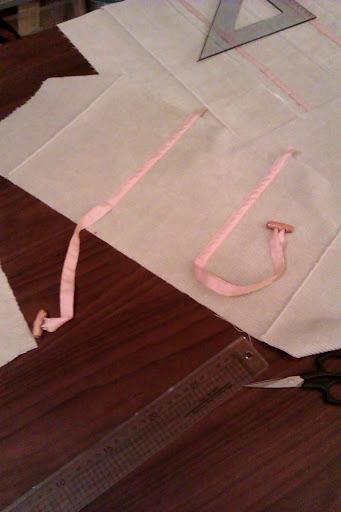
I took ribbon, doubled them an stitched them together to make them stronger. Make these two ribbons 54cm long. I stitched them onto the front, (BEFORE attaching the top yoke), 6.5cm either side from the centre zip. I left gaps for the duffel buttons to be fastened through. For my buttons, 3cm gaps were fine. Don’t make them too wide, or the buttons pop open easily. In my case, my first loops were 11cm from the bottom edge, then every 6-7cm all the way to the top edge. Reinforce these seams as they’ll take some tugging and pulling.
Then I attached the “front yoke”. Again, I reinforced the seam with two lines of stitching, zigzag, then I top-stitched the seam allowance to the top yoke.

Close-up of how the straps and buttons work. Use higher loops as bag fills up:
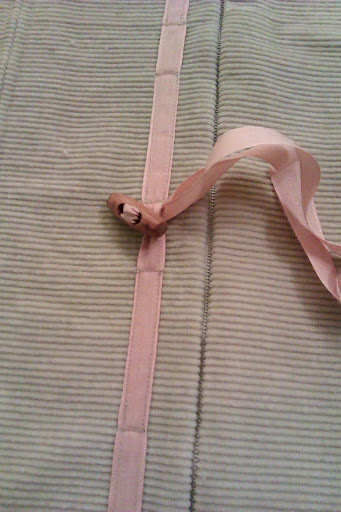
The button fasteners is ribbon (80cm) folded in half, button threaded on, and then stitched up to about an inch from the button.

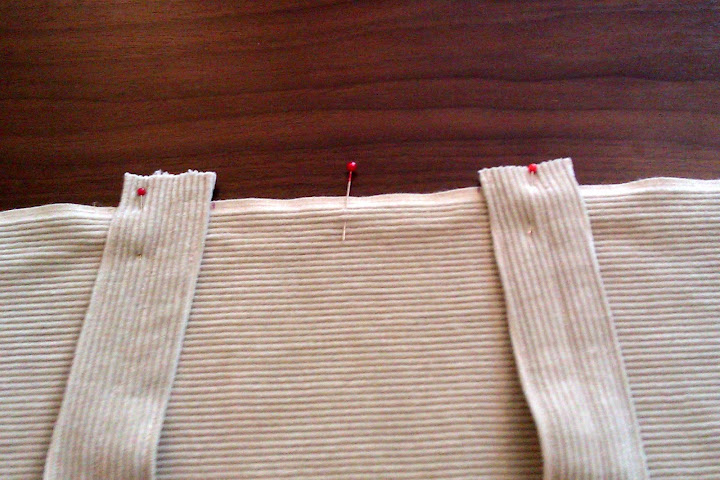
Take your back yoke piece, mark the centre top and bottom with a pin, then pin the button ribbons 6.5cm either side of the centre line. Stitch the ribbons down, from one edge to no more than 5cm from what will be the bag’s top edge (you’ll need space to insert top zip safely)
Now on to the straps. You need two fabric pieces Length 80cm, Width 11cm. Fold each piece length-wise and sew a long tube, seam allowance 1.5cm. Don’t close the end! Centre the seam to the middle of the tube and press open. I insert my long steel ruler to help centre the seam and pressing the seam! The ruler gets hot, so be careful when pulling out. Press again without ruler. Sew shut one end of the tube, grade the seam, then turn right side out (I use thicker knitting needle, head first).

I edge-stitch the straps’ both sides as before, and stitch straight down the middle to ensure they don’t twist and stretch.
Place pin in the centre (top and bottom) of the bottom piece. Attach straps in a slight angle 5.5cm each from top pin (try to ensure they have the same angle). Baste in place. Pin ends of straps to bottom edge, 9cm each from the centre pin. My straps are 73.5cm long measuring once they’re sewn on. Baste in place.
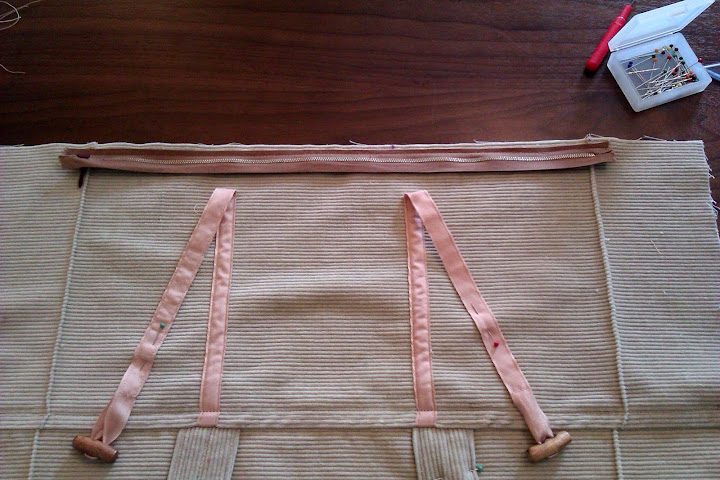
Sew back yoke and back bottom bit together. Make this weight-bearing seam strong by sewing it a few times, zigzag the seam allowance together, and top-stitch the seam allowance towards top.
Insert top zip (same technique as before) – only between the actual width of the bag as seen in photo. The zip needs to be approx 38-40cm. Centre the zip between the piping-type corners you stitched before.
Once the zip is attached on both sides, close the zip. Line up the sides and sew together (ONLY sides, not bottom). Reinforce the seams, zigzag all edges (sides and along the zip).

Fold down top edge, so the zip teeth just stand proud of the edge. Pin and stitch it down:

It gets fiddly and weird in the corner at the end of the zip (the end that doesn’t open). I hand-stitched the corner edge down.
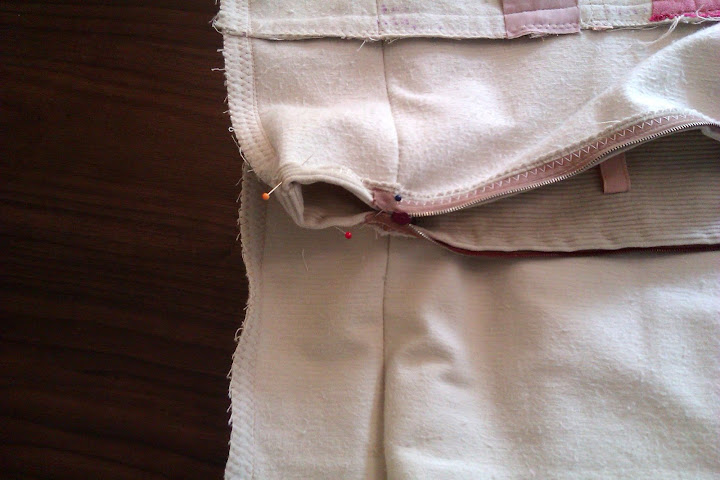
This is how it looks now. You can fold the sides in neatly and zip it up. The button ribbons can be slung over the top edge.

I was running late and forgot to take photos of the last bit – attaching the bottom square. The bottom measures Width 41cm, height 18cm. It is a little fiddly in the corners, but if you make a snip in the bag’s fabric (keep within the seam allowance) it’s easier to make it come together. Enforce this seam lots – re-stitch the seam again, zig-zag edges twice, too.
And it’s done! Can’t wait for Monday morning! Here it is in faked action, with coat:
Finished bag – empty…

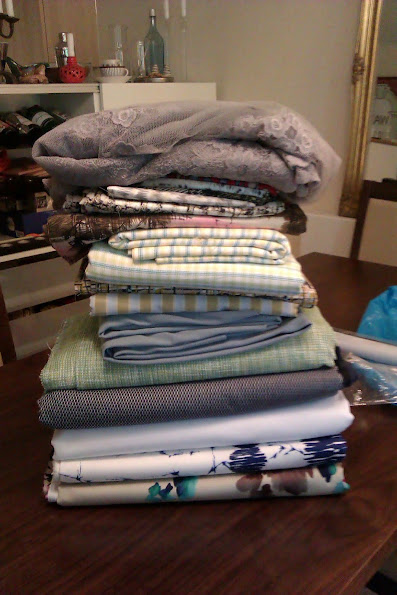
About three metres of jersey…

A LOT of jersey (8 metres, perhaps) a 3mx150cm heavy cotton, some shirts, 2.5m of polycotton…


Oops! Shop til you drop, Dollface!